Monday, October 26, 2009
Notice: The Merge
When I created this blog, I had hoped to magically tap into the font of infinite time, but I haven't even found the blasted thing yet! So since my sand crystals seem to have developed a frightening love for gravity, slipping through the neck of the hour-glass with dangerous rapidity, I have decided to conserve my efforts into one blog.
What you will find there (although I suspect you are already a Wrinkled Page reader) is a clever mixture of family anecdotes, my deep thoughts on life, a smidge of creative writing, and now.......drumroll please................crafty stuff! Wahoo!
Tuesday, October 6, 2009
The Owl Bag


I really want a new camera. Have I said that before? I just took at least 20 pictures of this bag, and these are the only 2 that aren't blurry.
Anyhow, this is what I worked on today while I was home with the sick child. It's a messenger bag made of sturdy olive green cotton twill with a subtle stripe going on. I drew the owl and appliqued him on the front flap. His eyes are antique snaps I found in my treasure box.
Strap and lining incorporate the fabric from his body and beak. It's a cute fall bag, perfect for any wise chick! Look for it soon on my etsy shop...as soon as I get a good picture, that is.
Monday, August 31, 2009
The Olive You Heart Bag


Notice my new label? Thanks to Jennifer's Jewels for that.
Friday, August 21, 2009
Earrings done!
I made a pendant too. Probably will just string it on a black leather cord.
Oh, and thanks to the helpful manager, who cut a strand for me so I could pick and choose my 3 favorite beads.

Monday, August 17, 2009
 Where to find these things? #1 and #2 are from Gap, #3 waon SUPER SALE at Kohl's,
#4 is from tinytokensdesigns.etsy.com (and a great deal too!), and #5 is from nonakednecks.etsy.com.
So far (sigh) I'm looking at #3 brand spankin' new in my closet and something similar to 1 and 2 as well. None of the jewelry. But maybe I can make some turqouise earrings...yeah, sure I can!
Saturday, August 15, 2009
Back to school
So it was three bags I had to make. As I cut out the pieces for Jared's (using the same pattern I had used for Jonah's preschool backpack--which, by the way, is still in perfect shape. Who told my sixth grader he's too cool for a T-Rex backpack, huh? Sheesh.), I was thinking, This is so easy! I am going to just whip through this thing. Then as I started sewing all the little parts of the many-pieced straps, I remembered very clearly why I had sworn a solemn vow eight years ago that I would NEVER NEVER make that backpack again. But it turned out okay.

So here's Jonah's. It's so hard (sigh) to find nice fabric for a boy his age. Skulls look a little iffy to me, but they were really the only choice. There was a weiner dog print, but it looked a little cutesy. Poor guy. The lining is all the skull fabric and it has 4 interior pockets and two big ones on the exterior of the bag (one under the flap and one on the back). I left some of the edges raw (on pockets, mostly) to make it look cooler--more distressed as it ages.

And here's Lauren's. You really don't get the full effect of its cuteness without a shot of the lining, but I forgot to take a pic of that. I bought two fabrics for the lining. The one (stripes) shows up in the body of the bird, and the other is a print with small birds and flowers and trees. I used a bird from that fabric to sketch the pattern for her applique. She has two exterior pockets and four interior too.
She wanted one really big pocket that was part of the lining--one that zipped closed to hold colored pencils, etc.--but I just couldn't figure out how to get the thing in there and still look good. I made the pocket, realized it was too small, cut the zipper off (instead of ripping out the seam) with a 1/2 inch edge of fabric all around the edges, and tried to recreate a larger pocket--only to realize I didn't have enough fabric left. I kept the zipper but ditched the pouch idea. Told her we'll just get one of those zip-up pouches for supplies.
Turns out, she already has one. So that's all good.
So we're ready for back to school. Just need to get the rest of the stuff to go IN the bags!

Saturday, August 8, 2009
A better trouser
 J Crew chins
Tuesday, August 4, 2009
Back to sewing
But I don't have a little girl to sew for any more...good thing I have a friend with one! I got the fabric last night, and after I get mom's approval on my choice, I'm going to get started. Yay sewing!!
Sunday, August 2, 2009
Depression is setting in...
 Not the horrible, debilitating kind, but still...a little bit of depression. See, here's the problem: I can't stop making crafts. And I've really gotten hooked on making these little watercolors, so hooked that I can't stop thinking of new ideas for them. But nobody is biting on my etsy shop, so I've made a very firm decision.
I'm not going to list anything new until I've made a sale. So I'm going to keep making all these cute little cards and paintings and sewing projects, but you won't know anything about them until somebody mans up and makes a purchase.
So there.
Friday, July 31, 2009
Products of my free time


Here's a close up on the appliqued flower I added to the front flap. Looks cute, doesn't it, with the hand stitching?

The next day, I did some card making, going back to making collages with cut out paper. (Really, I don't think my mom let me play with paper dolls enough as a kid. I just love cutting out little dresses and skirts.)

And here's another one...

All of these items are going up for sale on my etsy shop today, so get 'em while they're hot!
Tuesday, July 28, 2009
Here she is!
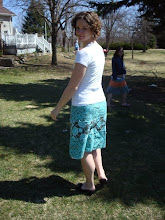
I have a skirt from Gap with an elastic waist that is very full at the top, and I don't like how it bunches at my hips, so I decided to start narrower at the top and add fullness lower. Here are my initial measurements:
Layer 1: 11" x 45"
Layer 2: 7" x 90"
Layer 3: 2" x 135" (added just to break up the bottom two layers, which are both heavily patterned)
Layer 4: 7" x 135"


And this is how I gather: I sew a zigzag stitch over heavy embroidery thread, careful to keep the thread in the middle of the zigzags. Then I just pull on the embroidery thread at each end of the zigzagged edge to gather things up.

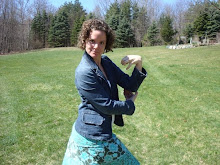
This is the finished product. I ended up making a few changes to the original design.

It's very comfy, though, and cool. When I walk down the stairs in our house, it floats around me. Love that.
And look how twirly (yes, that is the boys having a light saber duel in the background). Guess I still am a bit of a little girl.
Saturday, July 25, 2009
New Skirt Coming Soon!

I saw a little girls' skirt at the Plymouth Art Fair made by this designer, and I wanted one for myself! I'm a little too big to fit into her things, though, so I've been thinking ever since about making one for myself. Won't I be so cute? And pockets. Pockets are necessary...
Thursday, July 23, 2009
But the problem is, our house was built sometime before 1900, and our walls are plaster--and very uneven and bumpy in spots. I didn't want to buy the art, try to attach it, and have it not adhere. I emailed Single Stone Studios and asked about how they thought it would work, and they emailed me a free sample! How nice.
I was thinking they might send a tiny letter or something, but instead, they sent this fabulous bird! She was very easy to apply, and she looks great. Here are the steps:
1: Make sure wall surface is dust free.
2: Burnish the wall art by rubbing mightily with a credit card (this makes it stick to the vinyl...)
3: Run a piece of tape along the top of the wall art (on the backside) to position it.

4: Flip the art up and remove the paper backing. Then flip it back down (carefully--it's really sticky) to the wall.

5: Rub the wall art again with the card (I just used my thumb, actually) to make it cling to the wall. You can lift the paper carefully if you're curious (like I am) and want to make sure it's sticking.


Sit back and admire her!

I'm definitely going to be hitting Single Stone Studios up for a purchase soon. This bird was easy to apply (took MAYBE ten minutes total) and looks hand-painted. I'm thinking about painting my own little branch beneath her feet--but don't tell the MAN. He's not a big fan of painting on walls.
Wednesday, July 22, 2009
Shirt modifications

It came with a narrow belt made of the same fabric and loops maybe an inch above my natural waistline, but wearing the belt there just looks ridiculous on me, so I cut off the loops and tried wearing the belt here:

It wasn't very comfortable, though, and it still looked too blousy around my waist. I'm thinking of folding up the hem and making a casing, then running either narrow 1/4" elastic or the belt through it to make it have a different shape. Or maybe both the belt and the elastic?
I wish I knew how to do this:

Photo courtesy of A/Wear
Any ideas?
Sunday, July 19, 2009
Finding your craft
I know many other women like this. They walk up and down the aisles at J0-Ann, looking at all the options, picking up a package of brads here, sliding their fingers along the rainbow aisle of taffeta, picking up a craft book and flipping through the pages. And walking out of the store with empty hands.
Do you want to learn a craft? Are your itching fingers fighting a losing battle with your doubting heart? If so, maybe my blog will help. I will try to post a few times a week, sharing my craft projects, my ideas, my successes and failures.
And in the meantime, happy crafting.


